Hello and welcome to my blog! If you're new here or visiting from my Instagram post, thanks for stopping by :)
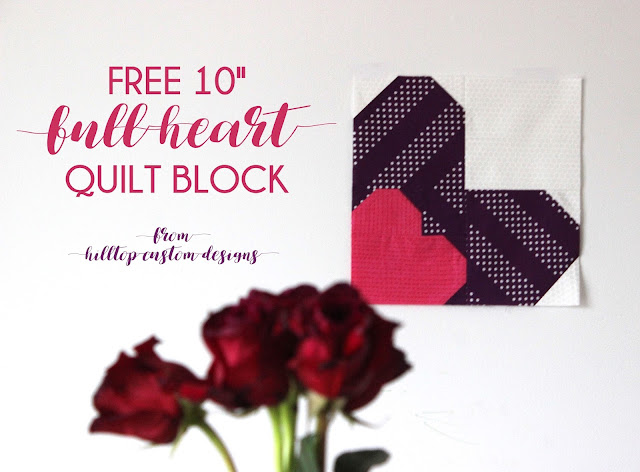
Today I've got a free 10" quilt blocked tutorial called "Full Heart" for you. It features a heart within a heart and the possibility for quilt layouts and color combinations are endless! I hope you'll enjoy this simple tutorial, if you'd like to save it for later please click here to access the PDF.
Please use #fullheartblock on social media to share your creations! :)
Pieces for ONE block:
Purple:
2 - 5 1/2" squares
1 - 2 1/2" square
4 - 1 1/2" squares
Pink:
1- 5 1/2" x 3 1/5" rectangle
1- 2 1/2" x 3 1/5" rectangle
White:
1 - 5 1/2" square
2 - 2 1/2" squares
2 - 2" squares
TIP: Chain piecing will make the process go much faster!
1/4" seams used throughout.
Instructions:
- Beginning with your (2) Purple 5 1/2" squares, ADD one White 2 1/2" square to the top right corner of one Purple square, then add one to the top left corner on the opposite Purple square - sew at the diagonal to create half-square triangles on the corners.
- Next, add the (2) White 2" squares on opposite corners of the large Purple squares you've just sewn - also sewing at the diagonal to create half-square triangles on the corners. You should now have two large Purple squares that look like the ones pictured above.
- Attach the single large 5 1/2" White square to the right side of your top Purple square as shown above - make sure the seam is sewn on the side of the purple square containing the 2" HST.
- Now, add (2) Purple 1 1/2" squares to the top of your Pink 5 1/2" x 3 1/2" rectangle, sewing at at the diagonal to create HST's. (ensure you attach both to the 3 1/2" side)
- Repeat for Pink 2 1/2" x 3 1/2" rectangle, except this time you'll be sewing the two smaller 1 1/2" purple squares to the long side of the rectangle.
- Attach your Purple 2 1/2" square to the top of the short pink rectangle, ensuring that the HST corners are on the right side as shown.
- Attach both pink rectangle blocks lengthwise, then add your final 5 1/2" Purple square to the right side of those blocks.
- You should now have two main pieces left to put together. Attach the Purple / White rectangle piece to the top of the piece containing the smaller pink heart and you're finished!
- Trim to 10" square.
Note: the white square on these blocks provides a great area for embroidery, especially if you're using this as a charity block to be donated to make a quilt for someone in need. You could easily add your name, city / state, or other information!
Many of you experienced quilters will be able to do this tutorial without the Instruction steps. Simply look at the diagram :) I hope this tutorial was explained well enough for you - as always feel free to leave comments or concerns or email me at hilltopcustomdesigns@gmail.com.


I really love the nested heart block. Thank you so much for sharing your tutorial and linking up with the Tips and Tutorials Festival!
ReplyDeleteI just wanted to let you know that because you shared this in the previous festival, it will not be eligible for the prizes this time.
Delete