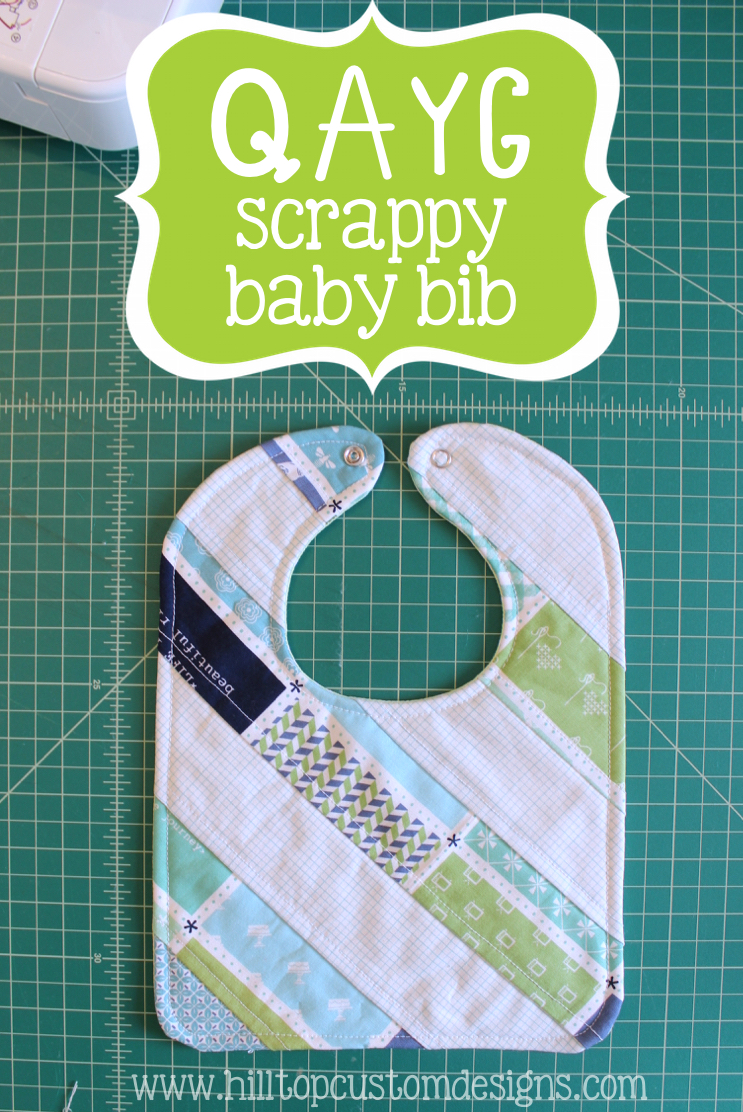
After working on my son's Spell It With Moda quilt (ill blog about this at another time) using a Modern Mini's Jelly Roll by Lori Holt I decided to use two of the leftover jelly roll strips (2.5" by WOF) to make a cute quilt-as-you-go bib that has a customizable length!
These bibs are a great scrap busting project and not much measuring is involved. Plus if you've never tried the QAYG method this is a great way to test it out!
Alright, let's get started! Or purchase the pattern PDF to view later :)
*Please note the pattern costs $5 and can be purchased here. This posts serves as a "stitch-a-long" or tutorial for those who need it. The pattern purchase comes with printable bib patterns to cut out, as well as printable instructions.
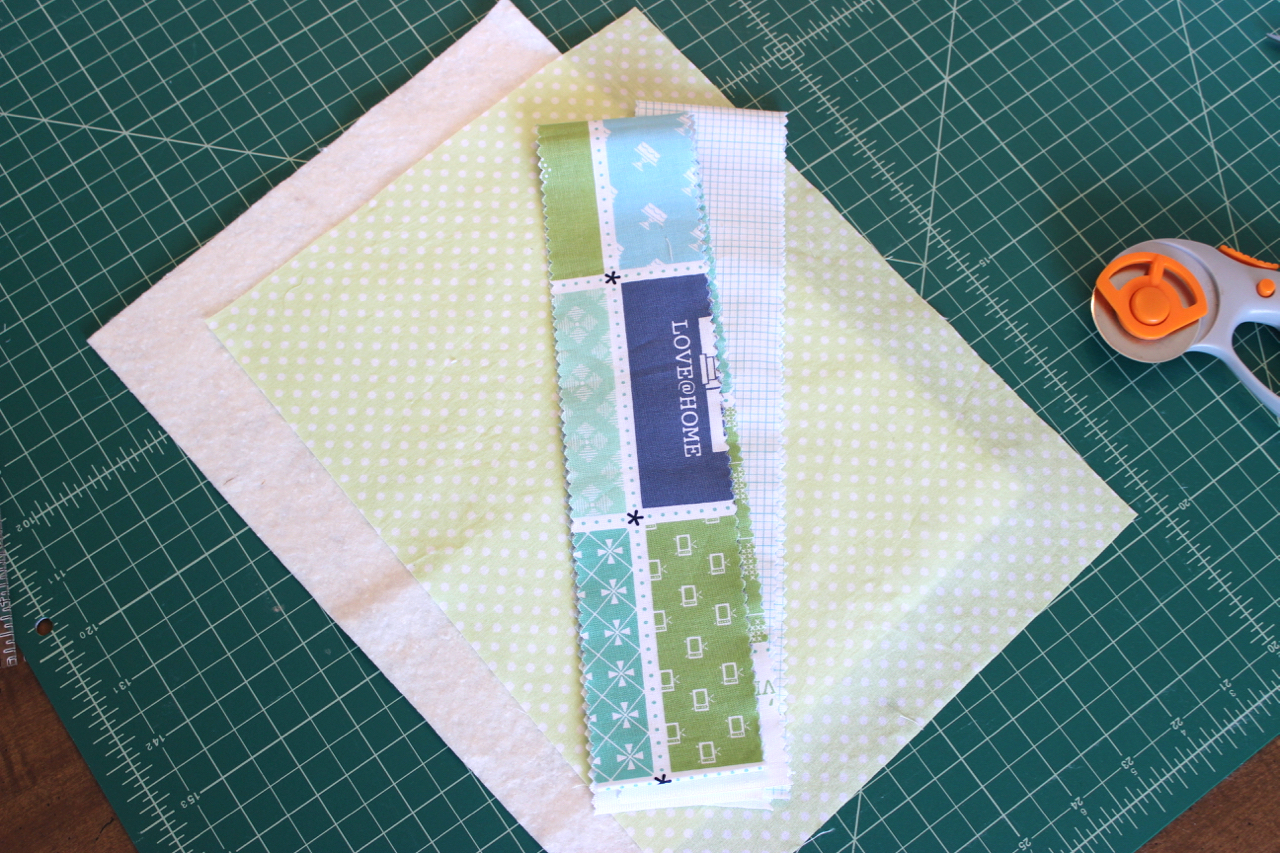
- Jelly Roll strips, Batting & Backing (sizes as noted in pattern)
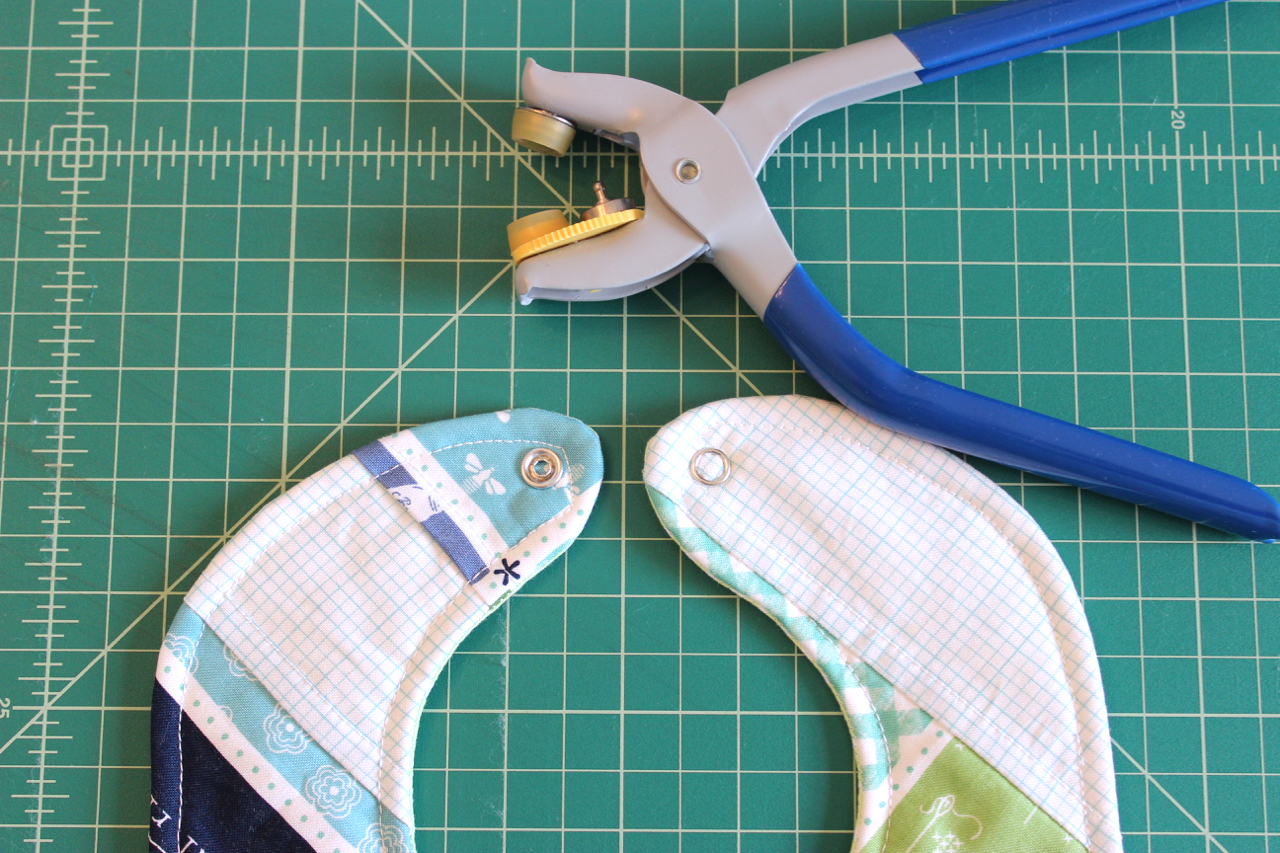
- Metal snaps or velcro hook & loop
- Printed pattern pieces
- Basic sewing supplies
Instructions:
Print and cut out pattern piece(s)
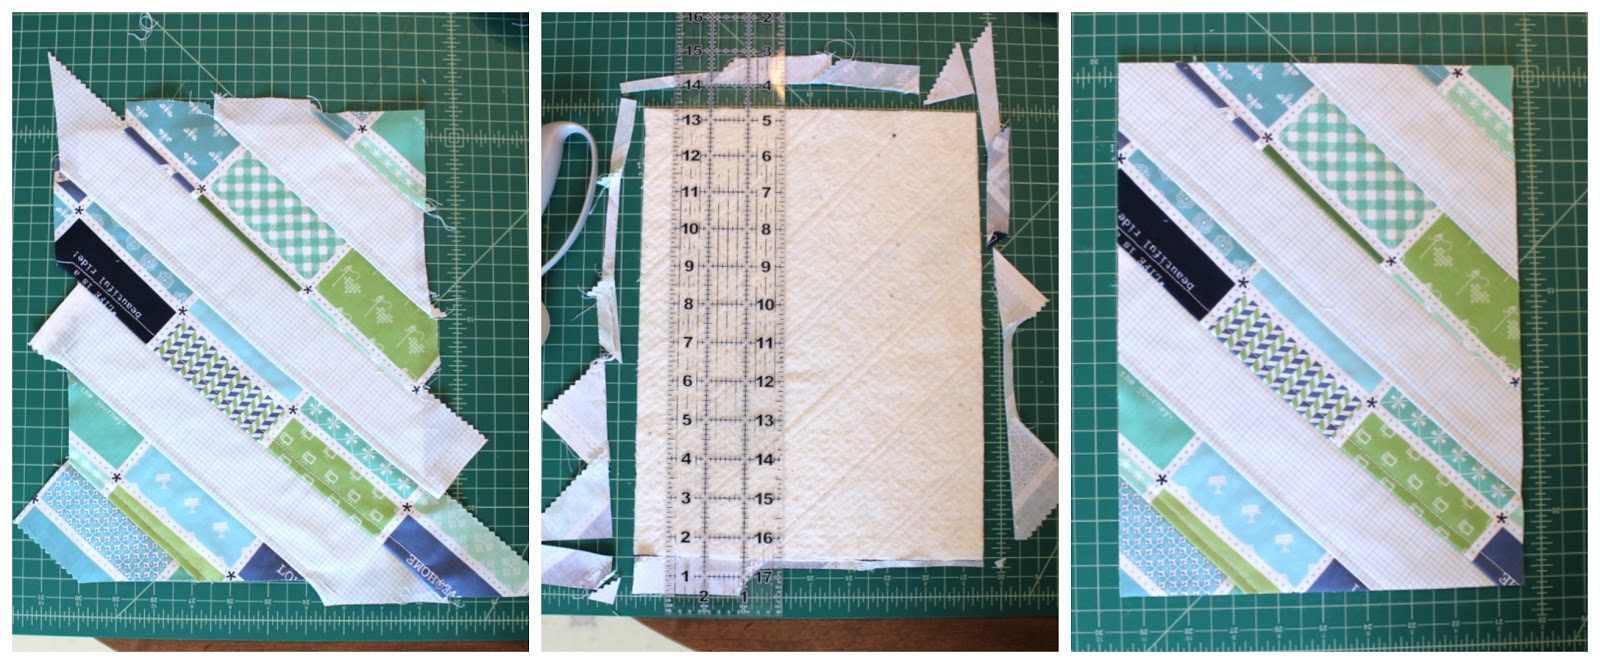
Start by laying your fabric strips or scrap pieces across your batting piece and cutting them off at each side (they should overlap your batting edges by approx. 1 inch to ensure there is enough fabric.)
Lay your first piece down in one corner of your batting. Stitch in place using a 1/4" seam allowance.
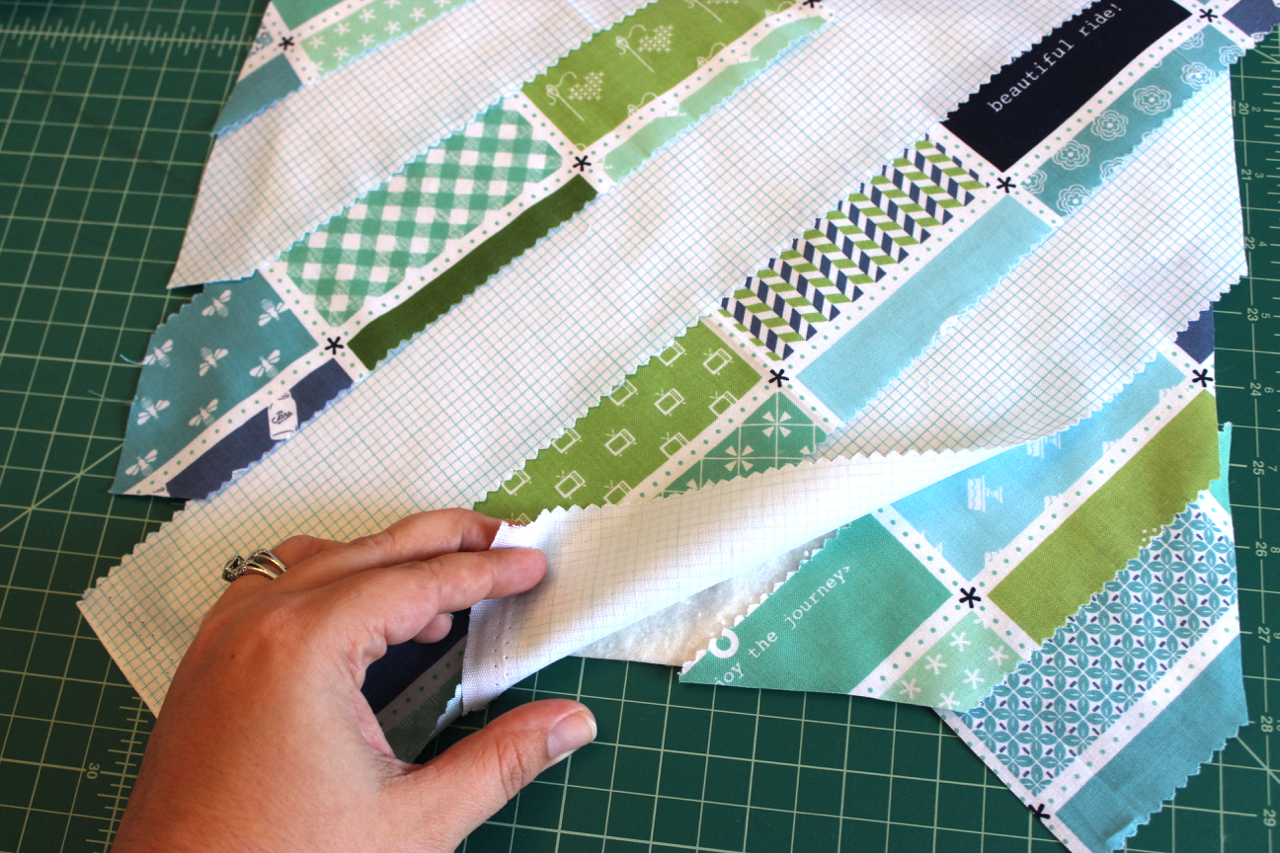
Put second piece of fabric down with wrong side facing up ontop of your first piece (as shown below) and stitch in place. Flip over and finger press or quickly press with an iron if needed.
Repeat this process with remaining fabric strips until the entire piece of batting is covered, stitching 1/4" away from each seam to secure all pieces.
Flip over and trim any excess batting off. Now you have a nice quilted rectangle :)
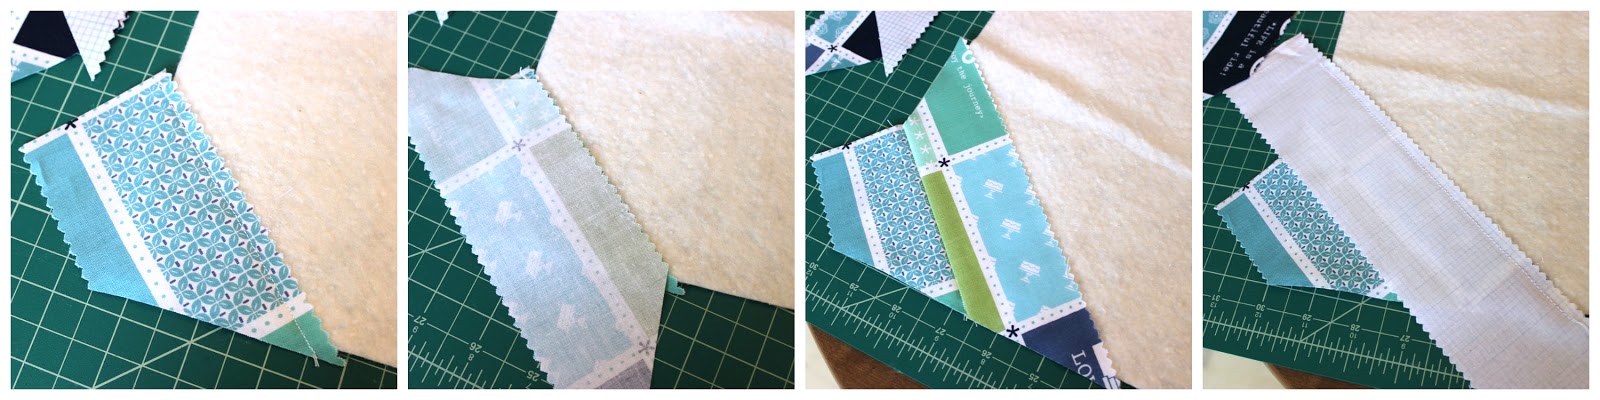
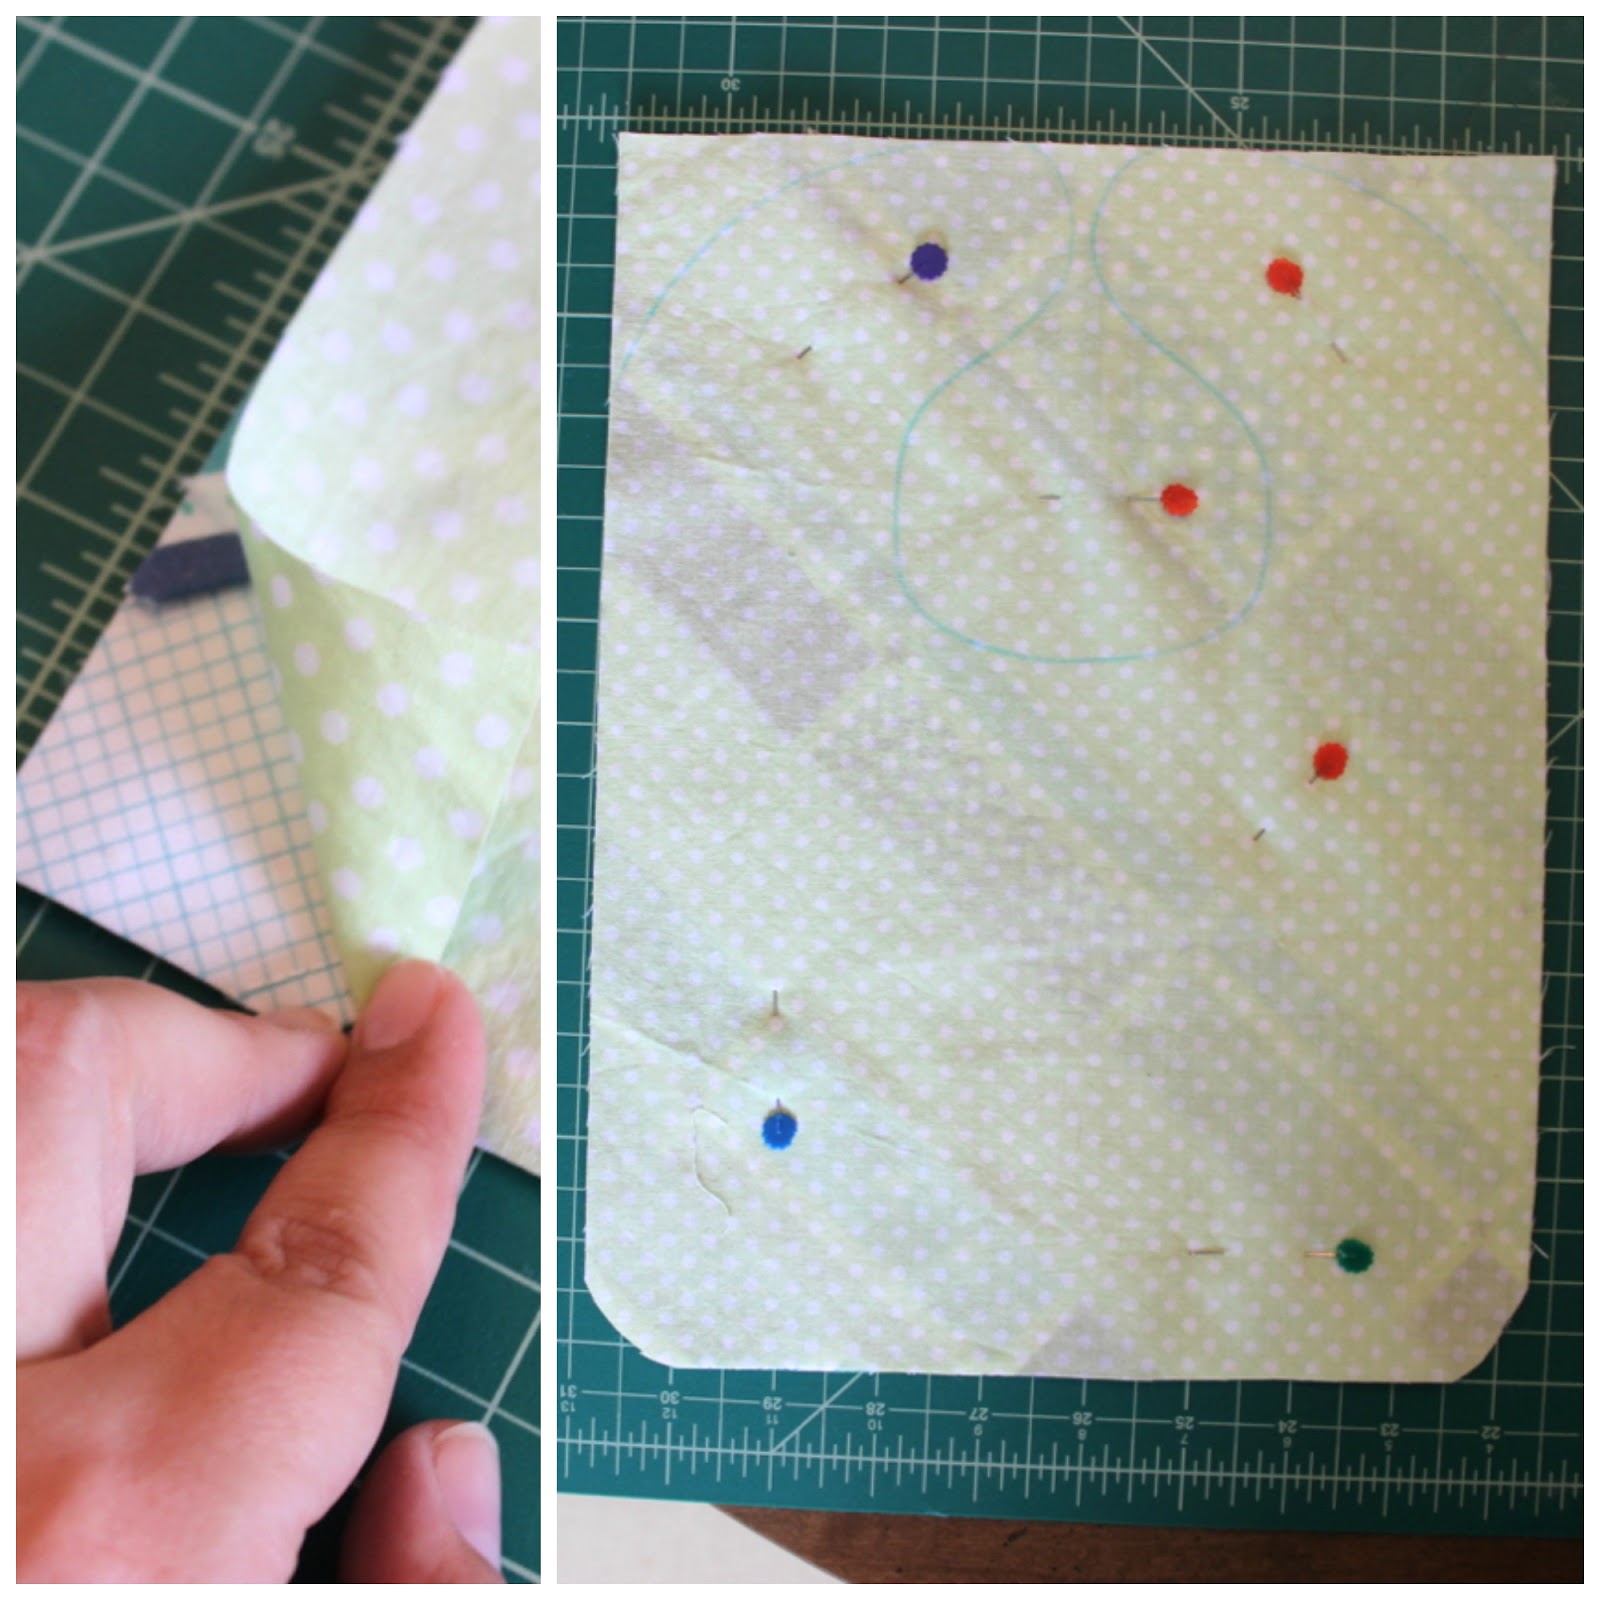
Lay backing fabric (I chose lime polka dots) with wrong side facing up ontop of your quilted rectangle. Place printed pattern piece at the top of your rectangle and trace with fabric marker or pen. *You do not need to trace the bottom line of the pattern piece, all we need is the neckline and shoulder straps traced :) (see below)
Use circular pattern piece to round of your bottom corners if you want. I chose to do this with mine, but I think it would look just as cute with straight edge corners!
Once all pattern pieces are traced, pin in place and get ready to sew!
Stitch all the way around the bib with a 1/4" seam allowance starting at one bottom corner, moving all the way around the bib and stopping approx. 2 inches from the beginning stitch as shown below.
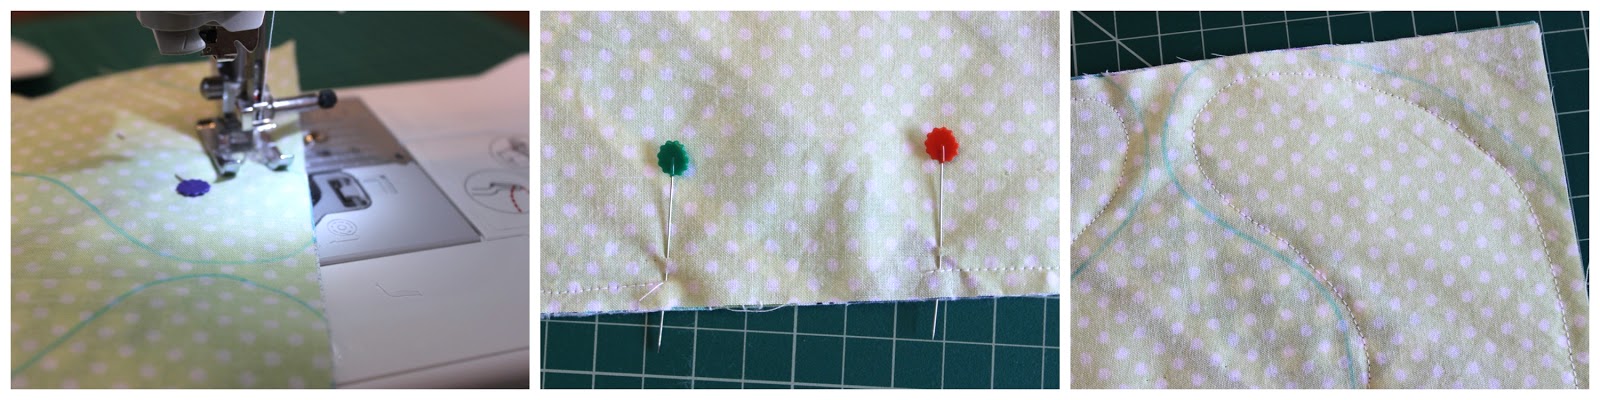 |
| Green pin marks starting point. Red pin marks stopping point. Leave opening! |
Trim off any excess fabric about 1/4" away from your stitch. Clip all rounded edges and corners to ensure the seams look nice and smooth when turned.
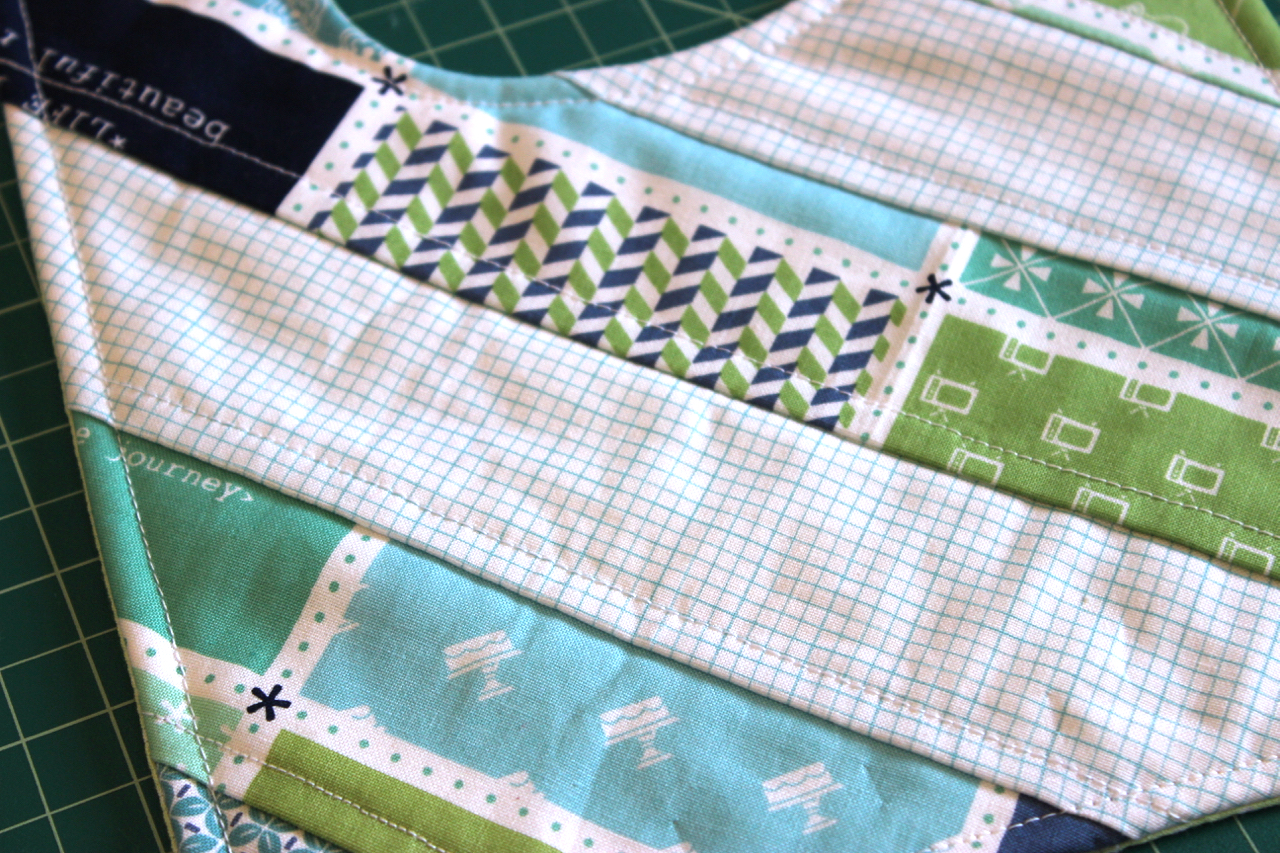
Turn right side out, making sure all corners are pushed out and top stitch all the way around the entire bib.
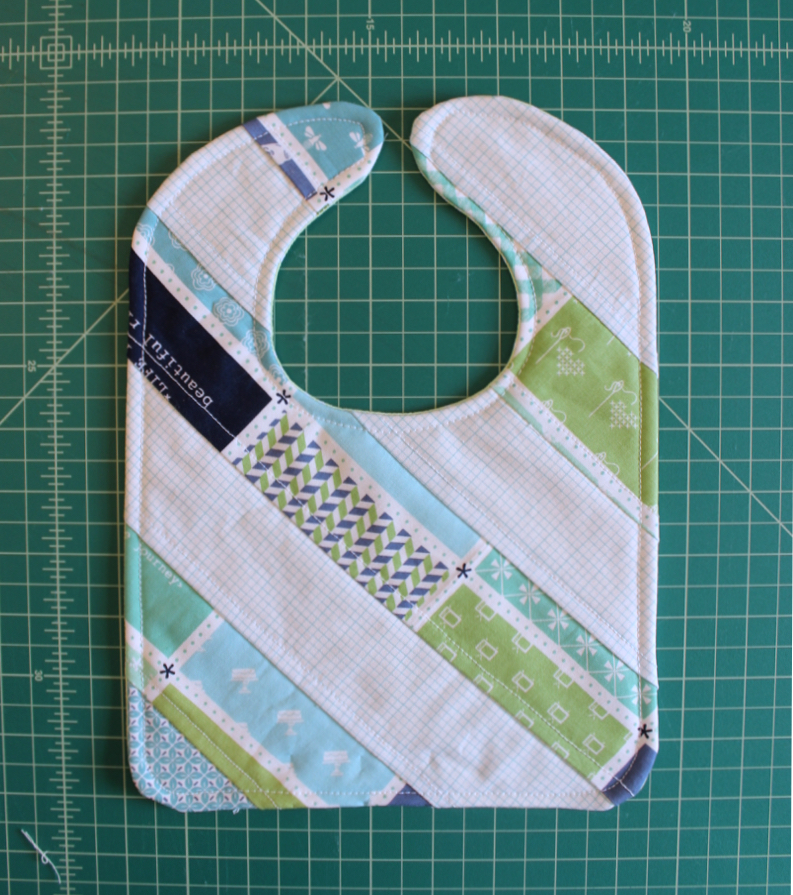
Add the final touches! Sew on your own custom label if you want and add some metal snaps or velcro strips. I chose metal snaps because I don't like the roughness of velcro and how it can warp over time and become hard to use.
You're done!!
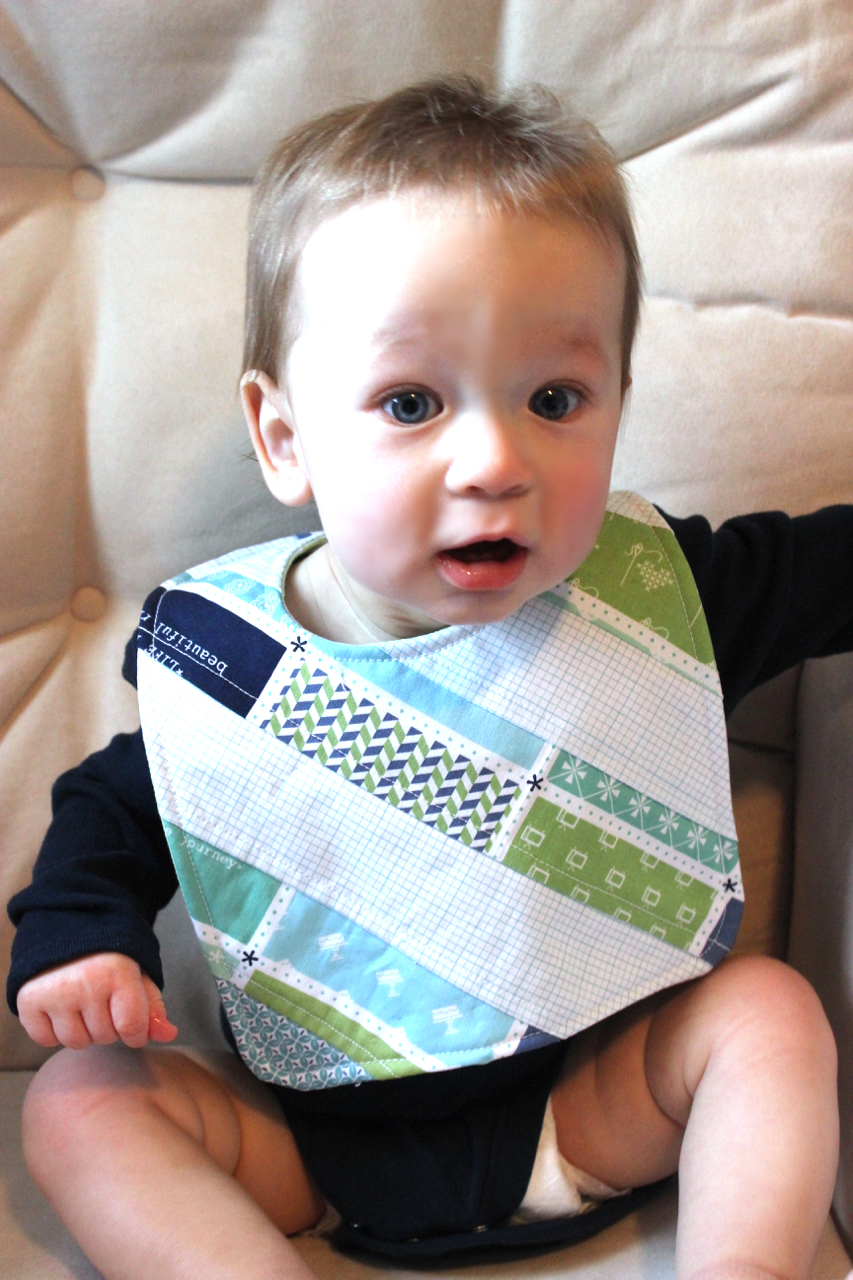
Enjoy your super cute quilt-as-you-go scrappy bibs!! I hope this tutorial was easy enough for you to follow. I'd love to see anything you make! Feel free to tag me on Instagram, Facebook, or Twitter! :) and use the hashtag #qaygscrappybabybib
And don't forget! - Adding a few inches to the length of this bib makes it easy to customize for older children, which is why there is no full size pattern piece! The size is up to you!


Post a Comment